It makes sense that one of the most important components of a golf club is the grip – it’s the only part we actually have any physical connection with.
I have changed my own grips before and to be honest, it’s not that hard. Cheap, easy and rewarding (as is the case with most jobs you do yourself). There’s certainly no need to be afraid of giving it a go.
A friend of mine has been playing with the same set of clubs for a very long time. The other day I noticed his grips were shiny, hard and cracked – probably due for a change about 10 years ago! – so I offered to help him out.
You can use grip tape or rubber cement to attach grips. I have incorporated directions for both methods in my tutorial below.
What you need:
– Grips
– Grip Tape
– Solvent (Mineral Turpentine)
– Cutting Blade (Hook)
– Masking Tape
– Vice
– Rubber Shaft Holder
– Plastic Container
– Rag
– Air Compressor (Not essential but handy)
What to do:

STEP 1 Secure your club and mark the alignment.
Secure your club in the vice using the rubber shaft holder. Don’t over-tighten the vice as you may damage the shaft. Just make it tight enough to hold it in place. A lot of grips have marking which need to be aligned with the face of the club and set square.
TIP: Place a piece of masking tape around the base of the grip (on the shaft). Use a ruler and mark where the old grip is set. This will allow you to align the new grip exactly like the old one. If you feel comfortable you can always align it later on by eye.
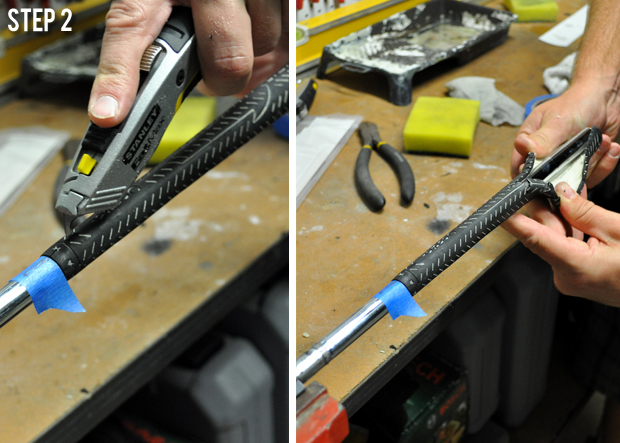
STEP 2 Remove the old grip.
Cut the grip off using the cutting blade. Try not to cut into the shaft, particularly if you are working with a graphite shaft. A hook blade will make this much easier. Start at the bottom and cut back up towards the butt of the club.
TIP: If you have an air compressor, and your grips are still in good condition, you may be able to remove them without damage by inserting a small air tool into the back of the grip to break the bond and then sliding them off.
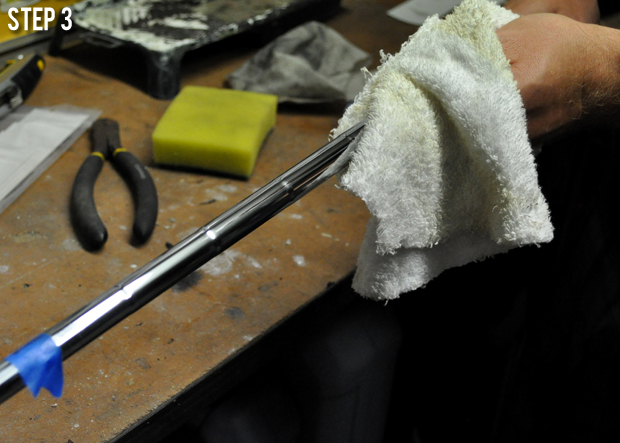
STEP 3 Remove the old grip tape or adhesive.
Remove the old grip tape or adhesive. This can be the hardest part of the job. To make it easier you can use a plastic scourer dipped in mineral spirits. Make sure that the shaft is clean and free of any residue or dust. Take extra care when working with graphite shafts not to damage the shaft.
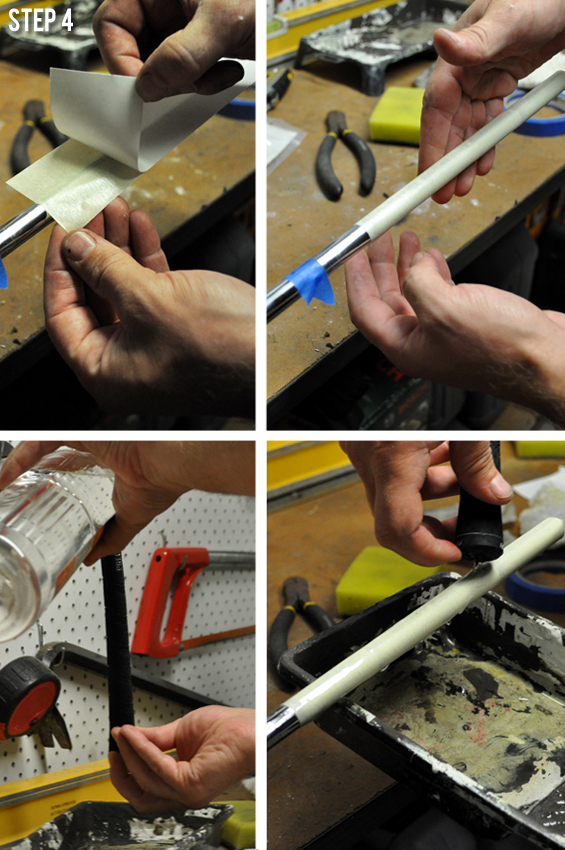
STEP 4 Prepare the new adhesive.
Peel the backing off one side then place the tape onto the shaft. Carefully remove the backing from the second side. Wrap the tape around the shaft making sure it is even and there are no bubbles (not the end of the world if you do get a small one).
Pour some of the mineral spirits into the grip. Don’t forget to put your finger (or a tee) over the small hole in the butt of the grip so the spirits remain trapped inside. Shake the grip to coat the inside. Remove your finger (or tee) from the hole then pour the mineral spirits onto the grip tape (this will make the sticky glue on the tape slippery for a while).
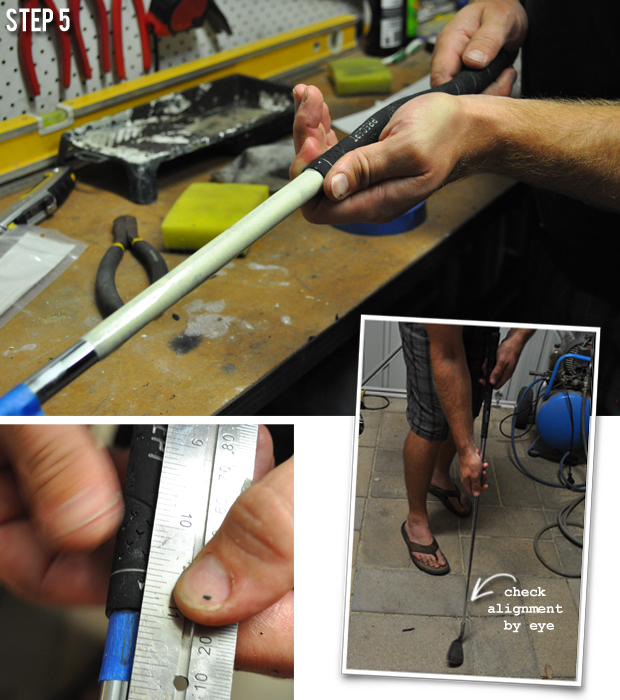
STEP 5 Put the new grip on.
Slide the grip onto the club, ensuring that you have pushed it all the way down. Align the new grip markings square with the clubface or if your placed masking tape to show you where square is then line them up with the mark you made on the tape. This can be easier if you remove the club from the vice and hold it facing down. Leave the club to allow the glue to bond. I generally wait overnight.
TIP: If you are having trouble getting the grip onto the shaft and aligning it, an air compressor makes this step very easy. Just attach the air nozzle into the hole in the butt of the grip and blow as you slide it on and align the grip.
STEP 6 Clean up.
Use a rag to remove any excess glue or spirits. Remove the masking tape you used for alignment.
I hope you find this tutorial useful and your re-gripping project rewarding.
Luke @ Golf Blog Australia

Nice article though I’m not sure I’ll ever give it a go myself!
Really enjoying the blog.
It really is very easy and really rewarding. Maybe start with trying one club and once you see how easy it is you’ll be offering to do your friends too!